


What Do Knee Replacement Photos Actually Show?
Knee replacement photos typically show three things: the exposed joint during surgery, the prosthetic components — femoral, tibial, and patellar — before and after they’re fitted, and the incision line as it heals over the following weeks. Modern implants like these carry survivorship rates above 90% at 15 years, according to national joint registry data.
What Do Real Knee Replacement Photos Reveal About the Procedure?
Real surgical photos of a knee replacement show a sterile, draped surgical field with the joint exposed through a single incision, damaged bone surfaces removed, and a metal-and-plastic implant seated in their place. The diagrams throughout this article illustrate the same sequence without the graphic detail of an actual operating table — useful for understanding the mechanics without the shock factor.
Surgeons work through an incision typically 15–25cm long down the front of the knee, opening the joint capsule before removing damaged cartilage and bone with precision cutting guides. What looks dramatic in a still photo is actually a highly standardised sequence: most total knee replacement procedures, often abbreviated TKR, follow the same six or seven steps regardless of surgeon or hospital.
Across photo sets and surgical diagrams, you’ll consistently see:
- A draped, sterile field with only the knee exposed
- Bone-cutting jigs positioned against the femur and tibia
- Trial implant components tested for fit before final placement
- The finished implant, either cemented or press-fit, seated in the joint
Key Takeaways
- Knee replacement photos generally show the exposed joint, the three implant components, and the healed incision — not a single dramatic moment.
- A total knee implant has three main parts: femoral, tibial, and patellar components, usually made from cobalt-chromium alloy and medical-grade polyethylene.
- Modern systems from manufacturers like Zimmer Biomet and Johnson & Johnson report survivorship above 90% at 15 years.
- Before-and-after photos are most useful for understanding scar healing and alignment correction, not for predicting your own recovery timeline.
- Seeing the real mechanics of the procedure tends to reduce pre-operative anxiety more than reading a written description alone.
What Are the Three Implant Components You’ll See in Photos?
Every total knee implant photo shows the same three parts: a femoral component capping the end of the thigh bone, a tibial tray seated on the shin bone, and a patellar button resurfacing the kneecap. KCM Clinic uses the Zimmer Biomet Genesis II system alongside Johnson & Johnson (DePuy Synthes) platforms for total knee replacement, the same device families used across NHS hospitals and major European orthopaedic centres.
The femoral component is a curved metal shield, usually cobalt-chromium, that recreates the rolling and gliding motion of the natural femur against the shin bone. The tibial tray sits underneath it, a metal base with a medical-grade polyethylene insert that acts as the cartilage substitute and absorbs load with each step.
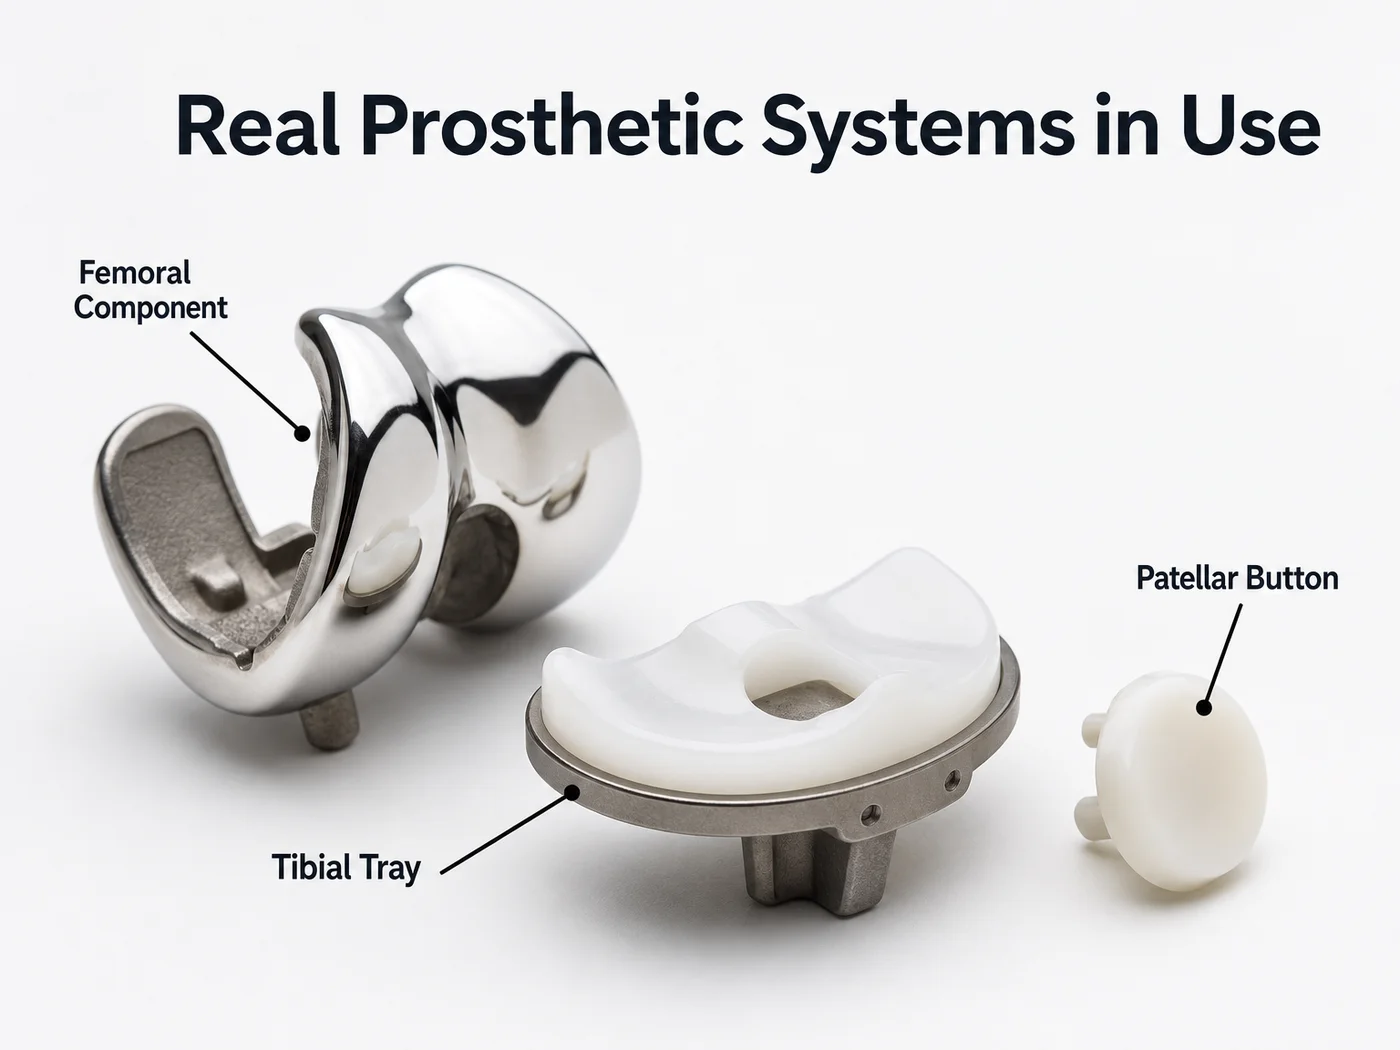
Three components, one joint: femoral, tibial, and patellar parts working together to replace the damaged surfaces.
The patellar button is the smallest piece — a polyethylene disc cemented to the back of the kneecap, and not every patient needs it resurfaced if the underlying cartilage is still healthy. Surgeons decide intraoperatively, which is one reason photo sets from different patients don’t always show identical implant configurations.
How Do Surgeons Perform the Procedure, Step by Step?
A total knee replacement follows a fixed sequence: positioning and marking, incision and exposure, bone resection with cutting guides, trial fitting, final implantation, and closure. Each stage typically takes under two hours combined, with the resection and implantation stages carrying the most precision work.
- The leg is positioned and the incision line marked while the patient is under anaesthesia.
- The surgeon opens the joint capsule and moves the kneecap aside to expose the femur and tibia.
- Damaged bone is cut away using jigs calibrated to the patient’s own alignment.
- Trial components confirm fit and range of motion before anything is fixed permanently.
- Final implants are cemented or press-fit into place, and the wound is closed in layers.
KCM Clinic’s Knee Replacement Approach
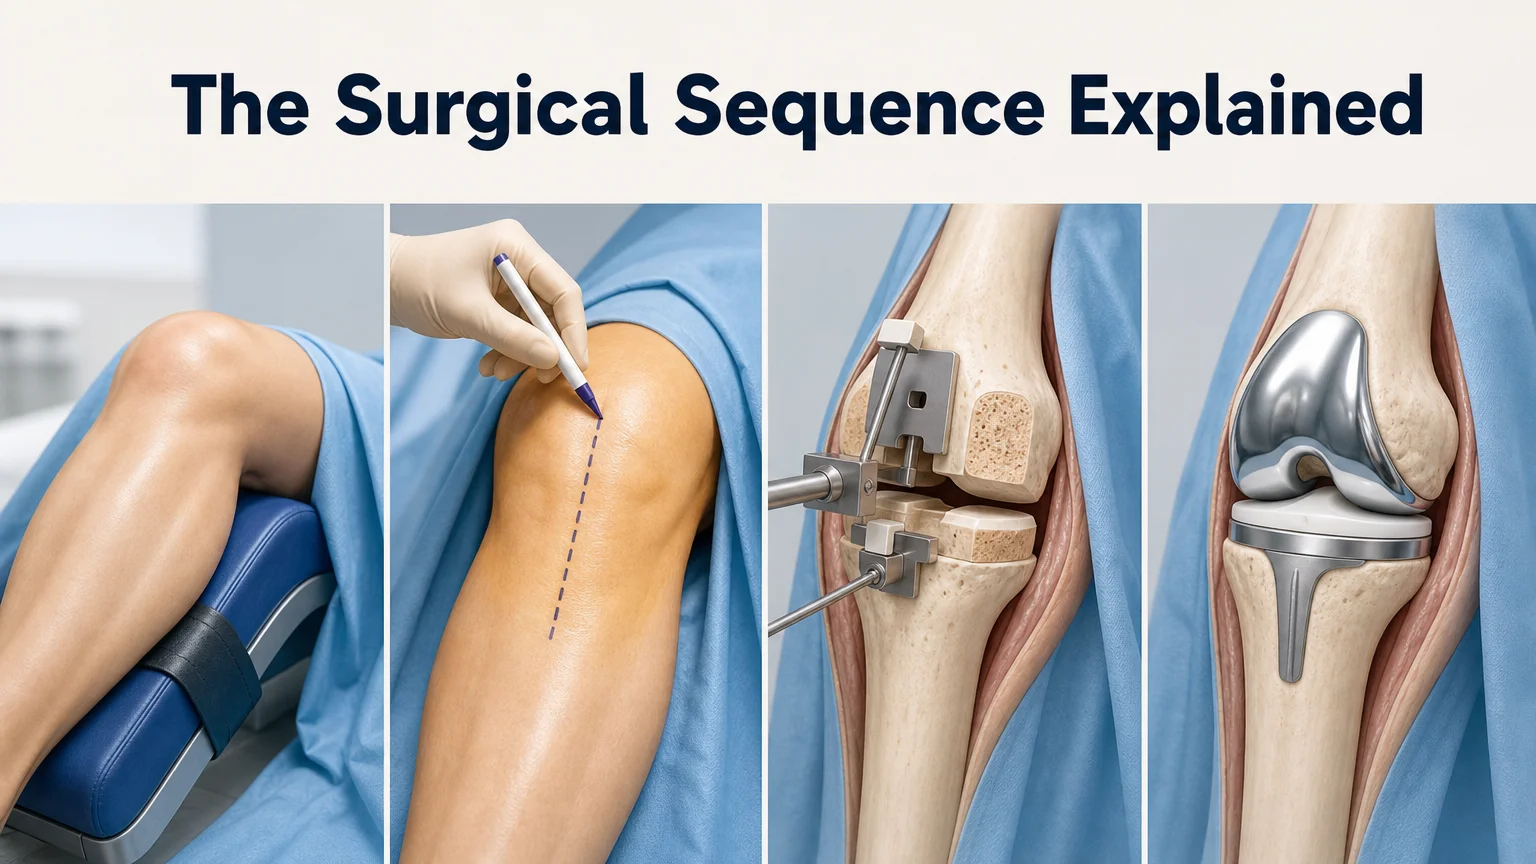
The same sequence shown in real operating theatres, broken down step by step.
At KCM Clinic, total knee replacement is performed using 3D laparoscopic-assisted surgical technology, giving surgeons enhanced depth perception during bone preparation compared with standard 2D magnification. Combined with Zimmer Biomet Genesis II and Johnson & Johnson implant systems, the aim is consistent alignment — the single biggest predictor of how long an implant lasts.
Every procedure sits inside an all-inclusive package: pre-operative assessment, the surgery itself, hospital stay, physiotherapy, dietetics and psychology support, and structured aftercare. Poland’s EU membership means the same clinical governance and device-safety regulation applies here as in Germany or France, not a separate standard for international patients. For UK self-funders comparing quotes, our breakdown of what a private knee replacement actually costs is a useful next read before booking anything.
What Do Before-and-After Knee Replacement Photos Show About Recovery?
Before-and-after photos usually track two things: how the incision matures from a raw line into a thin, pale scar, and how leg alignment straightens once the damaged joint surfaces are replaced. Neither tells you much about pain levels or function — those come from movement, not appearance.
Most patients walk without aids by around six weeks and resume driving by eight weeks after knee replacement. Full daily activity typically returns within three months, with complete recovery — including a return to recreational sport — taking nine to twelve months. Partial knee replacement recovery time runs faster on the same measures, generally four to six weeks to unaided walking rather than eight to twelve.
Worth knowing: A photo taken at two weeks and one taken at six months can look like different knees entirely — swelling and bruising dominate the early images, while alignment and scar fading dominate the later ones.
Anyone with visible joint-space narrowing or calcium deposits on an X-ray, sometimes linked to conditions like chondrocalcinosis, should expect their own photos to look somewhat different depending on how much cartilage damage existed beforehand.
Which Knee Replacement Technique Matches What You See in Your Photos?
The technique behind a knee replacement photo depends on how much of the joint was damaged: total replacement resurfaces all three compartments, partial replacement resurfaces one, and cartilage-preserving procedures avoid full replacement altogether where damage is limited. Reading an X-ray or surgical photo without that context can be misleading.
| Procedure | What photos typically show | Recovery time | Best suited for |
|---|---|---|---|
| Total knee replacement | Three implant components across the whole joint | 8–12 weeks to unaided walking | Damage across multiple compartments |
| Partial (unicompartmental) knee replacement | Smaller implant in one section, more natural bone preserved | 4–6 weeks to unaided walking | Damage confined to one compartment |
| Cartilage replacement / restoration procedures | Minimal hardware, focus on the cartilage surface itself | Varies by technique | Earlier-stage, localised cartilage loss |
Robotic-assisted surgery is increasingly common across orthopaedics and often shows up in marketing photos as a mechanical arm positioned over the joint. It’s a guidance tool for precision, not a different implant — the components themselves are the same Zimmer Biomet or Johnson & Johnson systems used in standard procedures. If you’re weighing a smaller intervention against a full replacement, our comparison of half knee replacement versus total knee replacement walks through how surgeons make that call.
Get a Clearer Picture Before You Book with KCM Clinic
Seeing the real mechanics behind a knee replacement — the components, the sequence, the healing curve — tends to settle more nerves than any written description. KCM Clinic performs total and partial knee replacement using named implant systems and a single all-inclusive package built for patients travelling from the UK and Canada.
Book a Free Consultation with KCM Clinic
Frequently Asked Questions
What do knee replacement X-rays and photos usually show?
X-rays show the implant’s alignment and fit against the bone in stark white against grey bone density, while surgical photos show the joint itself during the procedure. Together they confirm two different things: X-rays confirm positioning after surgery, photos explain the surgical steps that got there.
Is it normal for a knee replacement scar to look large in photos?
Yes, initially. A fresh incision typically runs 15–25cm and looks pronounced for the first few weeks, but it usually fades to a thin, pale line within 12 to 18 months. Scar appearance varies by skin type and healing speed, not by how the surgery itself went.
How can I tell if implant photos show a total or partial knee replacement?
A total replacement shows hardware across the whole joint — femoral, tibial, and often patellar components. A partial replacement shows a smaller implant confined to one compartment, with more of the natural bone and cartilage left untouched around it.
Does KCM Clinic use the same implant brands shown in typical photos?
Yes. KCM Clinic uses Zimmer Biomet Genesis II and Johnson & Johnson (DePuy Synthes) implant systems for total knee replacement, the same manufacturers referenced in most clinical photos and orthopaedic registries across the NHS and Western Europe.